
CASE STUDY

ONE PIECE: PIRATE WARRIORS 4 - DLC Land of WanoThis initially appeared to be one of the more straightforward DLC Metadata sets with a few surprises along the way. It was smooth sailing after some key art inconsistencies and a logo issue we're sorted out. Once the first set was locked in and approved we were off to the races on the additional sets.
|
Client: BANDAI NAMCO Entertainment
Category: Metadata, DLC Set Tools: Photoshop Platforms: Playstation 4 Designer: Evan Woolery |

|
Evan Woolery
Owner & Operator |
The following is a breakdown of the design process we went through from start to finish:
STEP 1: Directions
Need the following banners created for PS4: - Master Art - P1 - P2 - P4 - P27 - Small1 (W3) - IABSky (W5) - P13 - P37 - P42
Additional Direction/Restrictions:
- Do not edit the color of the background, character, or logo.
- Do not add any elements or edit the character on the key art.
- Do not cover the character's face.
- Character should not appear to be cropped.
STEP 2: Assets

|

|

|

|
STEP 3: Key Art Prep
As soon as we opened the file, we checked to see if there is a single layer at the very top with the key art flattened. There was not one so we immediately created in the form of a high-quality JPG, which we also embedded back into the file as reference. This was a critical very first step because it is very important that we ensure the integrity of the image throughout the process.

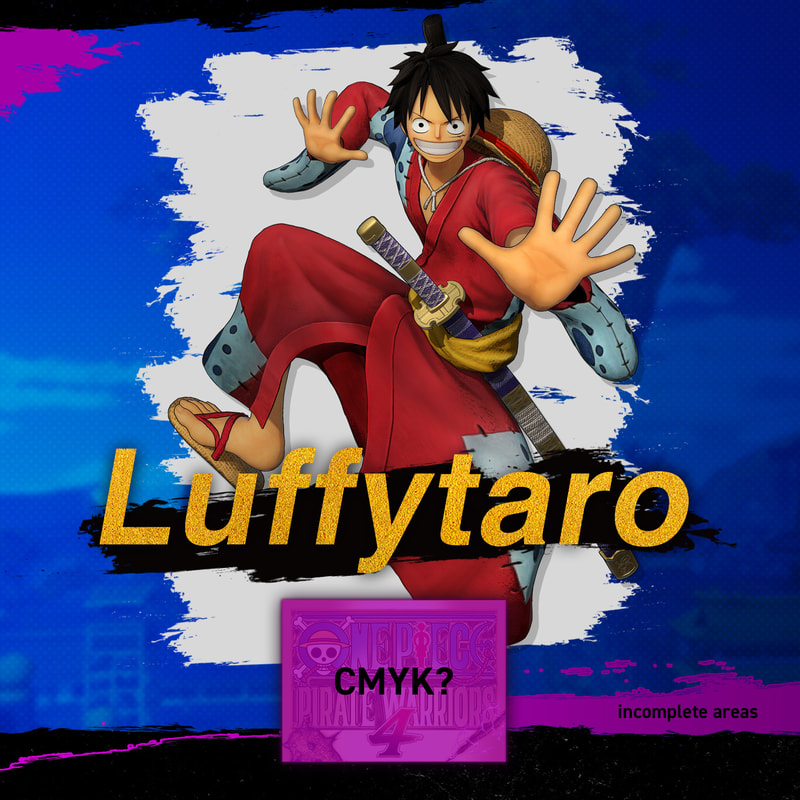
We studied the layer structure and started to translate the layer names into English. During this process, a few inconsistencies came to our attention. The background cityscape had a mask error that cutoff the bottom right area. The black brushstroke frame had two different texture qualities. The majority of the design is rough, but a few layers were just a flat black color. Lastly, the logo layer had a print color profile (CMYK) naming convention, which could be a problem since metadata requires a digital color profile (RGB).
We brought these issues up and were approved to clear them up because the directions pointed out how we are not to change the key art. We wanted to maintain the integrity of the design and fix some of the inconsistencies. If they were not pointed out early on, it can result in either an updated key art later, which means all the designs have to be updated and sometimes redone. Or in some cases it could go unnoticed all the way until it's released, which we never want to happen.
We brought these issues up and were approved to clear them up because the directions pointed out how we are not to change the key art. We wanted to maintain the integrity of the design and fix some of the inconsistencies. If they were not pointed out early on, it can result in either an updated key art later, which means all the designs have to be updated and sometimes redone. Or in some cases it could go unnoticed all the way until it's released, which we never want to happen.
|
|
|
The following is the process we went through to resolve the background inconsistencies and turn the background into a smart object:
With the background straightened out we proceeded to create smart objects for the assets we will need to swap out the most in this DLC set. In this case, those two assets are the character and the character's name.
Both of these smart objects had a brushstroke shape behind them, which we included to maintain consistency. You will also notice a few layer effects from the original key art. Layer effects are the most difficult element to properly scale with consistency across a range of banner sizes. Smart objects simplify the scaling process so long as the blending mode is simple (normal, multiply, etc.).
Both of these smart objects had a brushstroke shape behind them, which we included to maintain consistency. You will also notice a few layer effects from the original key art. Layer effects are the most difficult element to properly scale with consistency across a range of banner sizes. Smart objects simplify the scaling process so long as the blending mode is simple (normal, multiply, etc.).

|

|
At this point we have created out three smart objects from background to foreground.
We then scaled them to match the original key art size and placement. Notice the original reference image we created when we first opened the file at the very top layer. We normally set that to 50% opacity to help with the that step and double-check everything. The layer structure is also more simplified and much easier to work with.
- CharacterText _01_Luffytaro.psd
- Luffytaro + Brush.psd
- OPPW4_DLC-Luffytaro_BG
We then scaled them to match the original key art size and placement. Notice the original reference image we created when we first opened the file at the very top layer. We normally set that to 50% opacity to help with the that step and double-check everything. The layer structure is also more simplified and much easier to work with.

Right before we started work on the Metadata we created a visual guide to center the artwork in the exact center of exact banner we will paste it into.

STEP 4: The First Set
We started with the PS4 Metadata template that we created with just the banners requested with the Guides/Restricted Zones visible. We try to arrange the banners with similar aspect ratios together for comparison and a faster workflow.
PS4 Metadata Template

Version 01

A few minor revisions were requested from Version 01. Mainly scale changes for the character and name plate. This version was approved, which means we were able to move forward with the three other characters in the set. The most notable revision was in regards to the logo, which was a smart object from the original key art. It was scaled down to 17.05%, which created a jagged aliased glitch. We fixed this issue with a 100% scaled logo rasterized down to the same scale that was approved for each banner. The difference is very slight and the rasterized logo was a bit fuzzier than the smart object.
|
Smart Object Logo (17.05%)
|
Rasterized Logo Scaled Down
|
Version 02 - APPROVED

STEP 5: Parity
The rest of the set was easy to create after the standard was set. We created smart objects for the character and nameplate, which sped up the process to quickly swap out each element. Some banners required the character and brushstroke shape behind to be adjusted separately, which we created with smart objects again.
As a rule of thumb, we first matched the scale and placement of the character's head to the first set. Some adjustments were requested based on the different poses of each character to fit each banner. Mostly to avoid awkward crops and overlaps with other elements.
As a rule of thumb, we first matched the scale and placement of the character's head to the first set. Some adjustments were requested based on the different poses of each character to fit each banner. Mostly to avoid awkward crops and overlaps with other elements.
FINAL APPROVED DLC SET
